Issue your own Verifiable Credentials
Updated: October 22, 2020
The preview credential issuer capabilities in Azure AD allow you to issue your own Verifiable Credentials. In a few simple steps, you can configure Azure AD to produce customized Verifiable Credentials that meet the needs of your particular use case. The articles that follow will guide you through the following steps:
- Set up Azure AD to issue Verifiable Credentials.
- Configure the properties of your Verifiable Credentials, including their contents.
- Customize the look and feel of your credentials to match your brand.
- Integrate Verifiable Credentials issuance into your app or website.
Note
In order to complete this tutorial, your tenant must be onboarded to the Verifiable Credentials preview. Please contact us if you would like to gain access.
Requirements to issue credentials
To issue Verifiable Credentials, you need the following services.
| Service | Requirement |
|---|---|
| Azure AD | An Azure AD tenant with a premium license. A free trial is sufficient. |
| Azure | A valid Azure subscription in the same Azure AD tenant. |
| Azure Key Vault | An instance of Azure Key Vault with the ability to create keys and secrets. |
| Azure Blob Storage | A storage account with the ability to create containers and upload blobs. |
| Identity provider | Any identity provider that supports the OpenID Connect standard for federation. Examples include Azure AD and Azure AD B2C. More detail is available in Credential Structure. |
| NodeJS | You must be able to run a simple Node server that can display a single web page containing an issuance request. More detail is available in Issue Credentials. |
Create your directory
To get started, you first need an Azure AD tenant. In the world of Verifiable Credentials, your Azure AD tenant will represent your organization. When your tenant is enabled for the Verifiable Credentials preview, it will be assigned a decentralized identifier (DID) and be equipped with an issuer service for issuing credentials. Any credential you issue will be issued by your tenant and its DID. At this time, the Verifiable Credentials preview also requires an Azure AD Premium license.
Once you've followed these steps, you can confirm you've successfully enabled the preview by checking for the existence of the issuer service in your tenant. Navigate to the Azure Active Directory blade in the Azure Portal. In the Enterprise applications section, search in the All applications view for "Verifiable Credentials Issuer Service". Be sure to select "Microsoft applications" from the Application Type drop down.
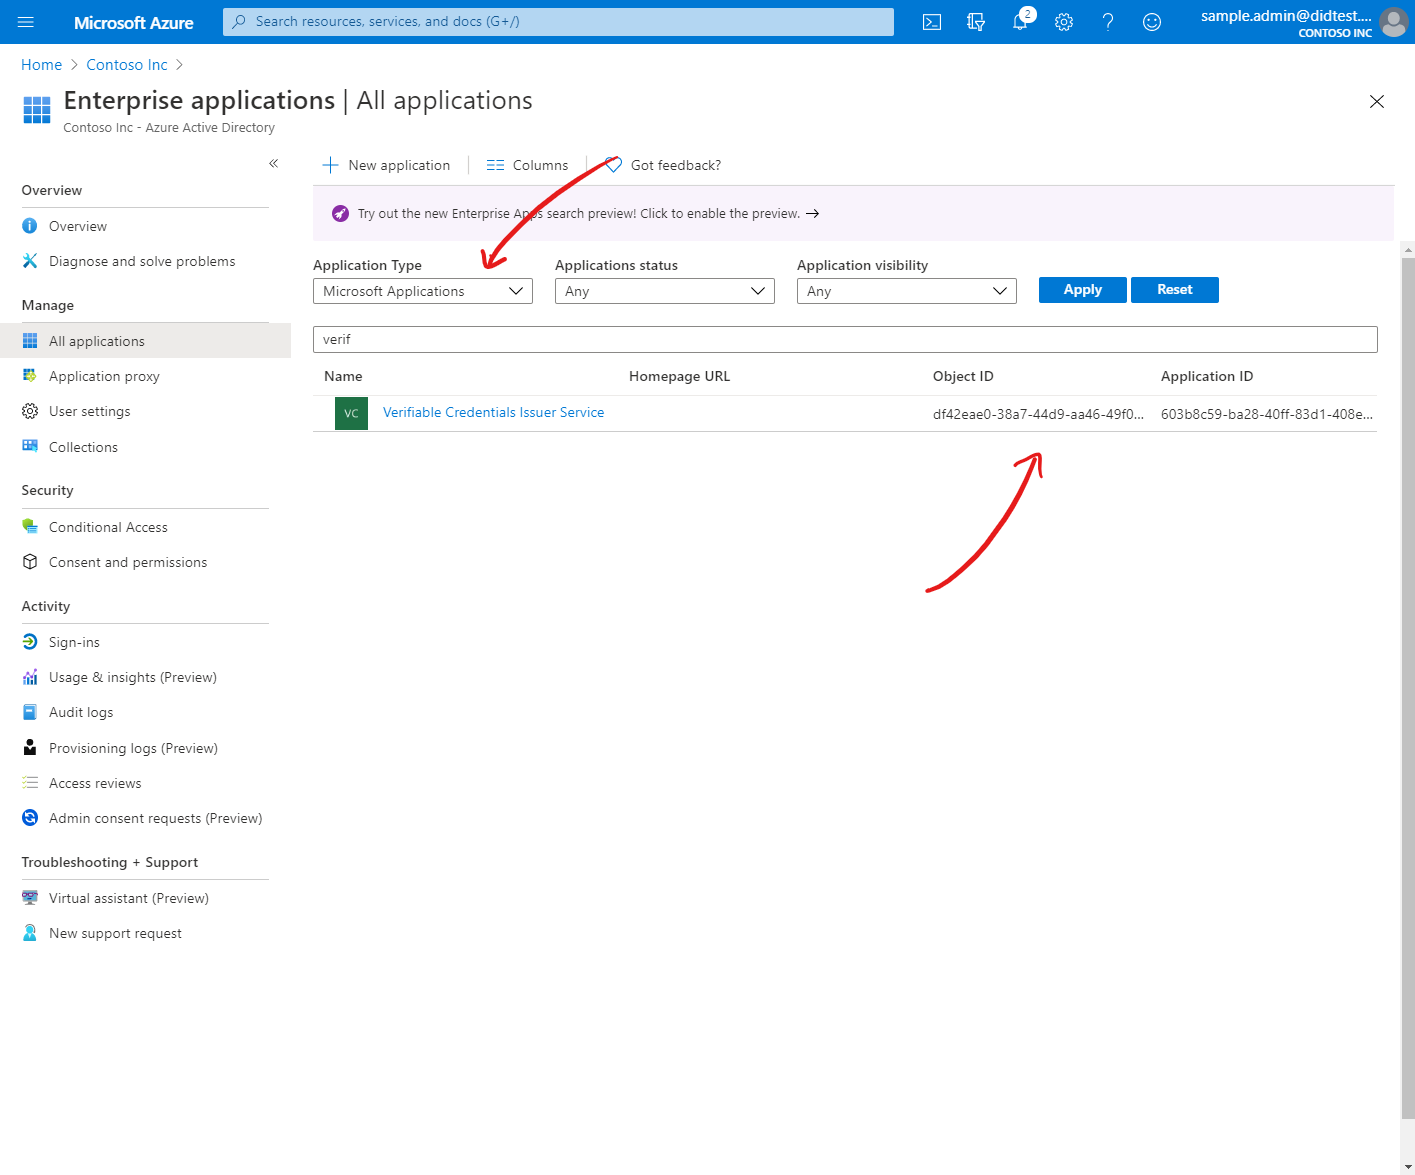
At this point, your tenant has been successfully enabled for the Verifiable Credentials preview. Continue onto the next section to set up your credential issuer service.
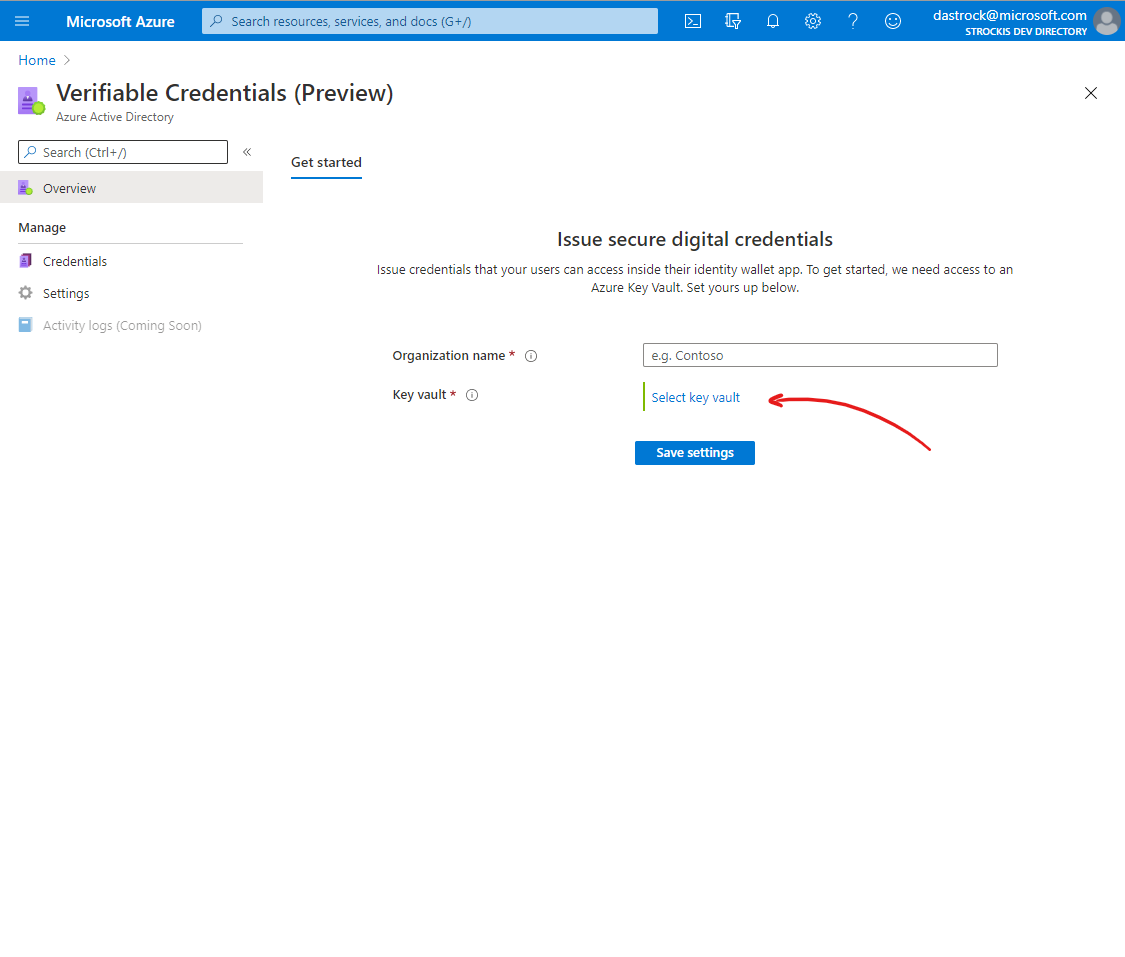
Set up Azure Key Vault
In the Verifiable Credentials preview, you have complete control and management of the cryptographic keys your tenant will use to digitally sign Verifiable Credentials. To issue credentials, you must provide Azure AD with access to your own instance of Azure Key Vault. Note that each Key Vault transaction will incur a cost to your Azure subscription. Review the Key Vault pricing details here.
| Detail | Recommended |
|---|---|
| Region | East US |
| Pricing Tier | Standard |
| Detail | Required |
|---|---|
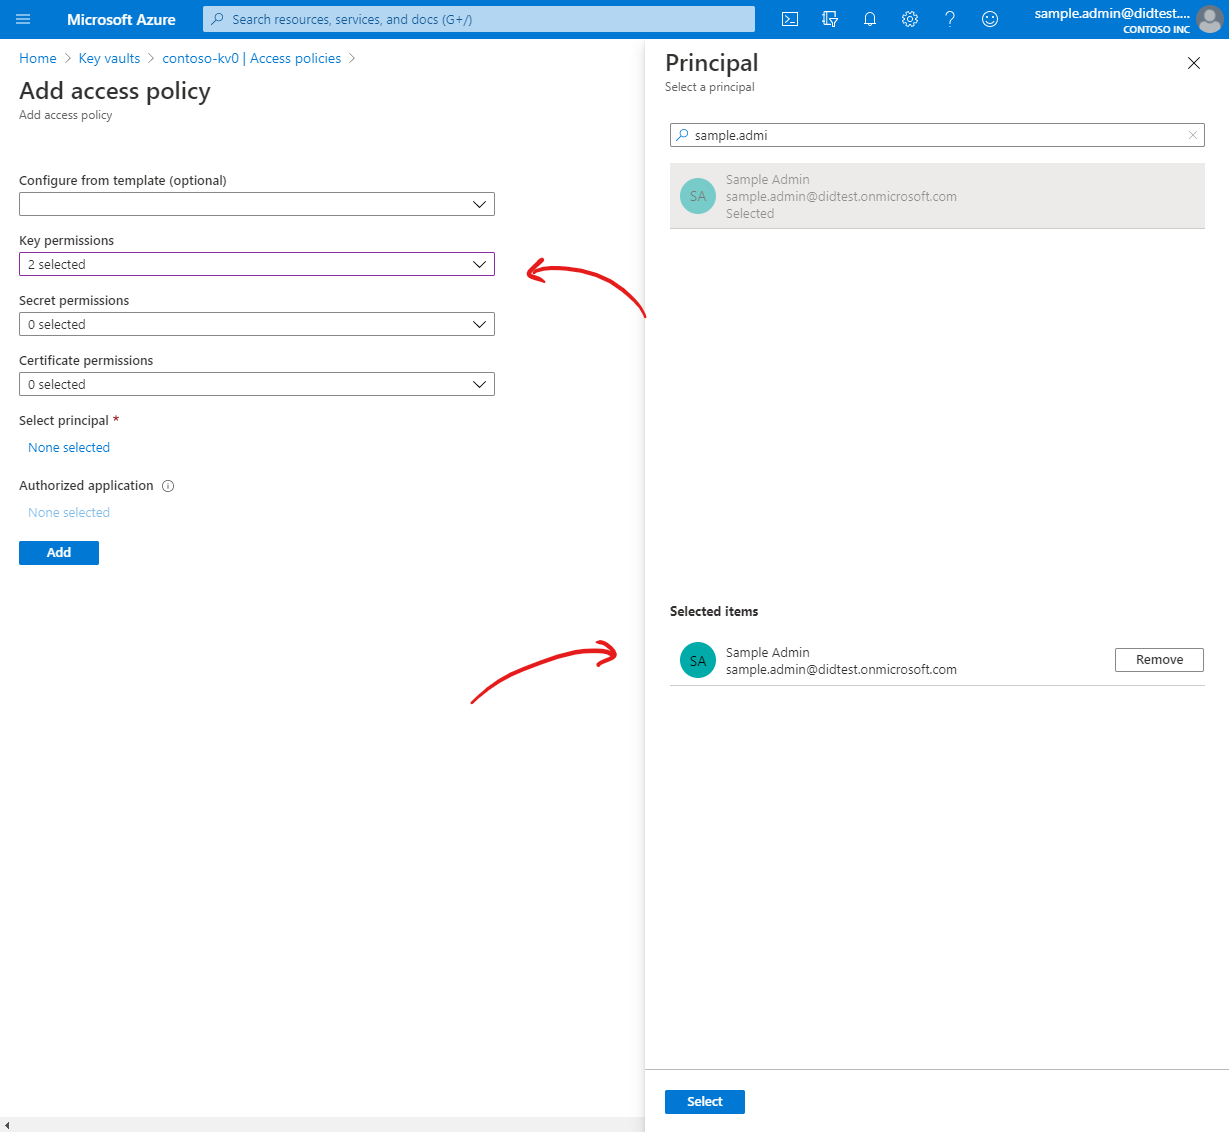
| Principal | Your user account. |
| Permissions | At minimum, permit the Key Create and Key Get operations. |
Once your key vault details have been saved, several cryptographic keys and secrets will be created in your vault.
You should have 3 keys in your keyvault with the names issuerRecoveryKeyION-GUID, IssuerSigningKeyION-GUID and IssuerUpdateKeyION-GUID If you check the Access Policies of the keyvault the Verifiable Credentials service should be listed with 6 Key permissions (Get, List, Create, Import, Verify and Sign) and 3 secret permissions (Get, list and Set).
During the Verifiable Credentials preview, keys and secrets created in your vault should not be modified once created. Deleting, disabling, or updating your keys and secrets will invalidate any credentials issued in the future. Do not modify your keys or secrets during the preview.
You have now successfully configured Azure AD to issue Verifiable Credentials using cryptographic keys in your Azure Key Vault. In the next article, we'll begin to define the details of the Verifiable Credentials you will issue. Continue onto the next article to configure an identity provider as a data source for your Verifiable Credentials.
See something missing? We'd love your feedback and input on the Verifiable Credentials preview. Please contact us. When you use Microsoft DID Services, you agree to the DID Preview Agreement and the Microsoft Privacy Statement.