Design your Verifiable Credentials
Updated: June 11, 2020
Verifiable Credentials offer a limited set of options that can be used to reflect your brand. This article provides instructions how to customize your credentials, and best practices for designing credentials that look great once issued to users.
Cards in Microsoft Authenticator
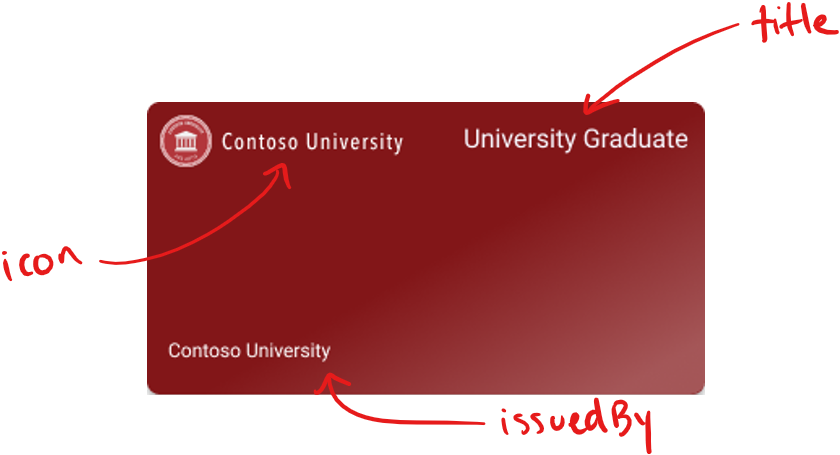
Verifiable Credentials issued to users are displayed as cards in Microsoft Authenticator. As the administrator, you may choose card color, icon, and text strings to match your organization's brand.

Cards also contain customizable fields that you can use to let users know the purpose of the card, the attributes it contains, and more.
Create a credential display file
Much like the rules file, the display file is a simple JSON file that describes how the contents of your Verifiable Credentials should be displayed in the Microsoft Authenticator app. Note that this display model is only used by Microsoft Authenticator at this time. Over time we'll be working with standards communities to define new display models that are supported by many identity wallet apps. The display file has the following structure.
{
    "default": {
      "locale": "en-US",
      "card": {
        "title": "University Graduate",
        "issuedBy": "Contoso University",
        "backgroundColor": "#212121",
        "textColor": "#FFFFFF",
        "logo": {
          "uri": "https://contoso.edu/images/logo.png",
          "description": "Contoso University Logo"
        },
        "description": "This digital diploma is issued to students and alumni of Contoso University."
      },
      "consent": {
        "title": "Do you want to get your digital diploma from Contoso U?",
        "instructions": "Please log in with your Contoso U account to receive your digital diploma."
      },
      "claims": {
        "vc.credentialSubject.name": {
          "type": "String",
          "label": "Name"
        },
        "vc.credentialSubject.major": {
            "type": "String",
            "label": "Major"
          },
          "vc.credentialSubject.date": {
            "type": "String",
            "label": "Date Issued"
          },
          "vc.credentialSubject.studentId": {
            "type": "String",
            "label": "Student ID Number"
          }
      }
    }
}
| Property | Description |
|---|---|
locale |
The language of the Verifiable Credential. Reserved for future use. |
card.title |
Displays the type of credential to the user. Recommended maximum length of 25 characters. |
card.issuedBy |
Displays the name of the issuing organization to the user. Recommended maximum length of 40 characters. |
card.backgroundColor |
Determines the background color of the card, in hex format. A subtle gradient will be applied to all cards. |
card.textColor |
Determines the text color of the card, in hex format. Recommended to use black or white. |
card.logo |
A logo that is displayed on the card. The URL provided must be publicly addressable. Recommended maximum height of 50px, and maximum width of 200px. |
card.description |
Supplemental text displayed alongside each card. Can be used for any purpose. Recommended maximum length of 100 characters. |
consent.title |
Supplemental text displayed when a card is being issued. Used to provide details about the issuance process. Recommended length of 100 characters. |
consent.instructions |
Supplemental text displayed when a card is being issued. Used to provide details about the issuance process. Recommended length of 100 characters. |
claims |
Allows you to provide labels for attributes included in each credential. |
claims.{attribute} |
Indicates the attribute of the credential to which the label applies. |
claims.{attribute}.label |
The value that should be used as a label for the attribute. Recommended maximum length of 40 characters. |
To issue verifiable credentials, you need to construct your own display file. Begin with the example given above, and change the following values.
card and consent sections to your desired values.
mapping section of your rules file, add an entry in the claims section of your display file. Each entry provides a label that should be used for the corresponding attribute in your Verifiable Credential.
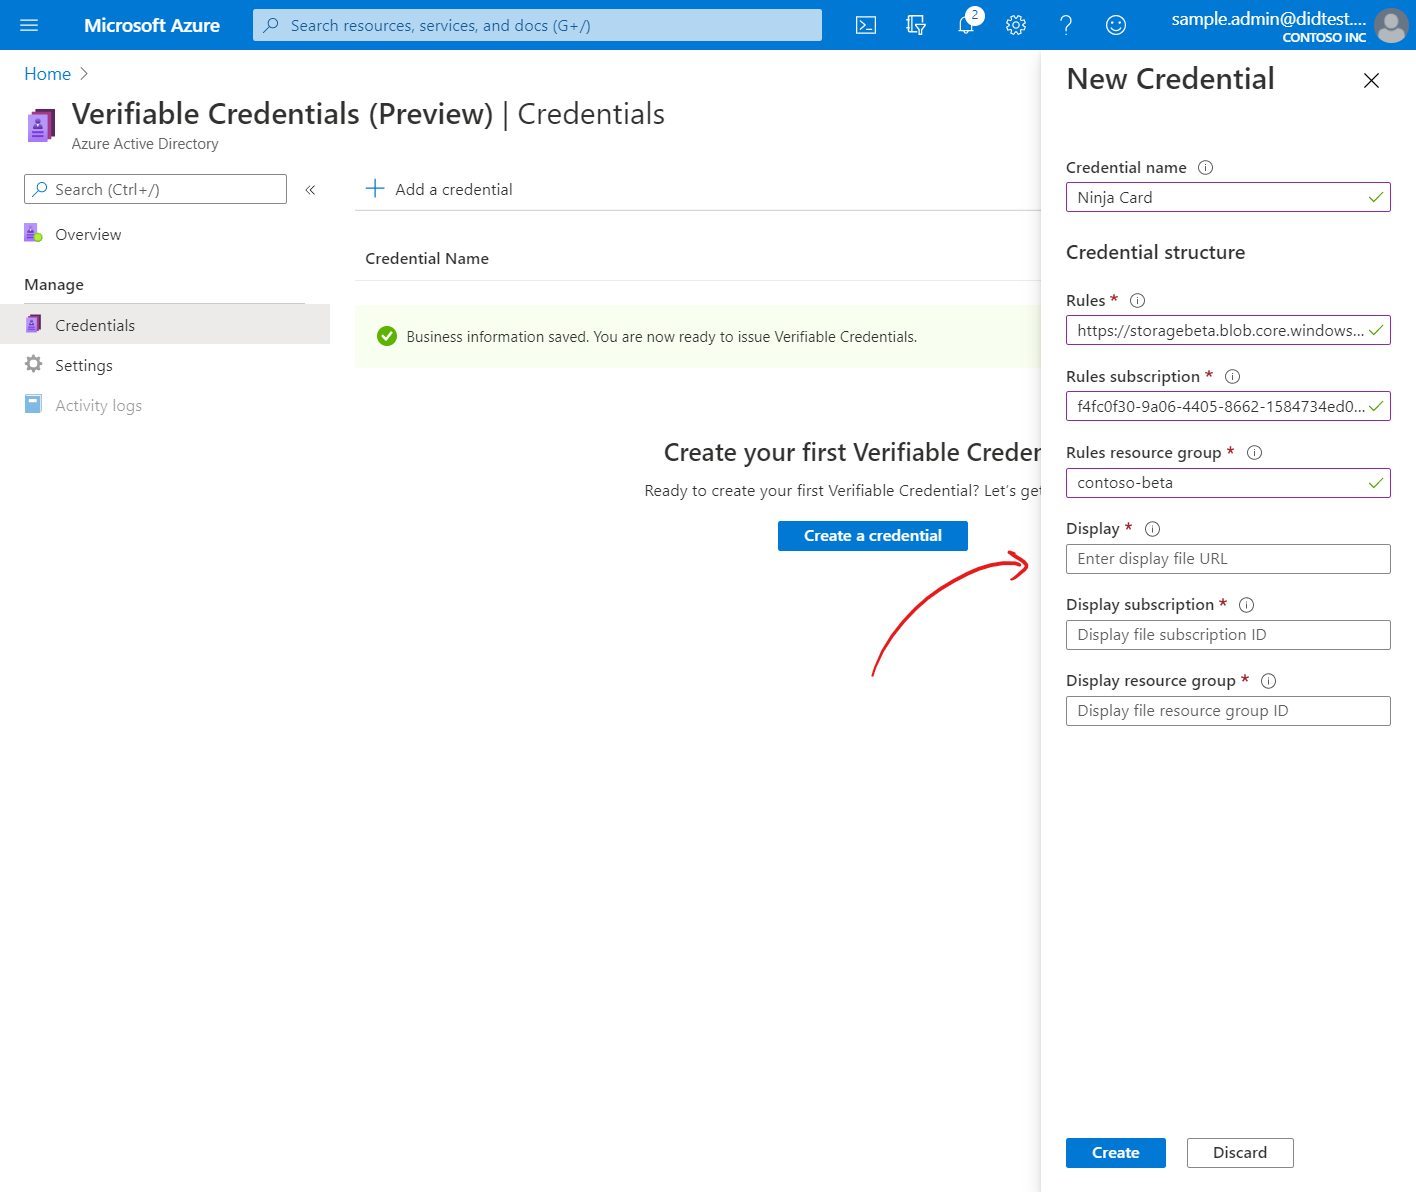
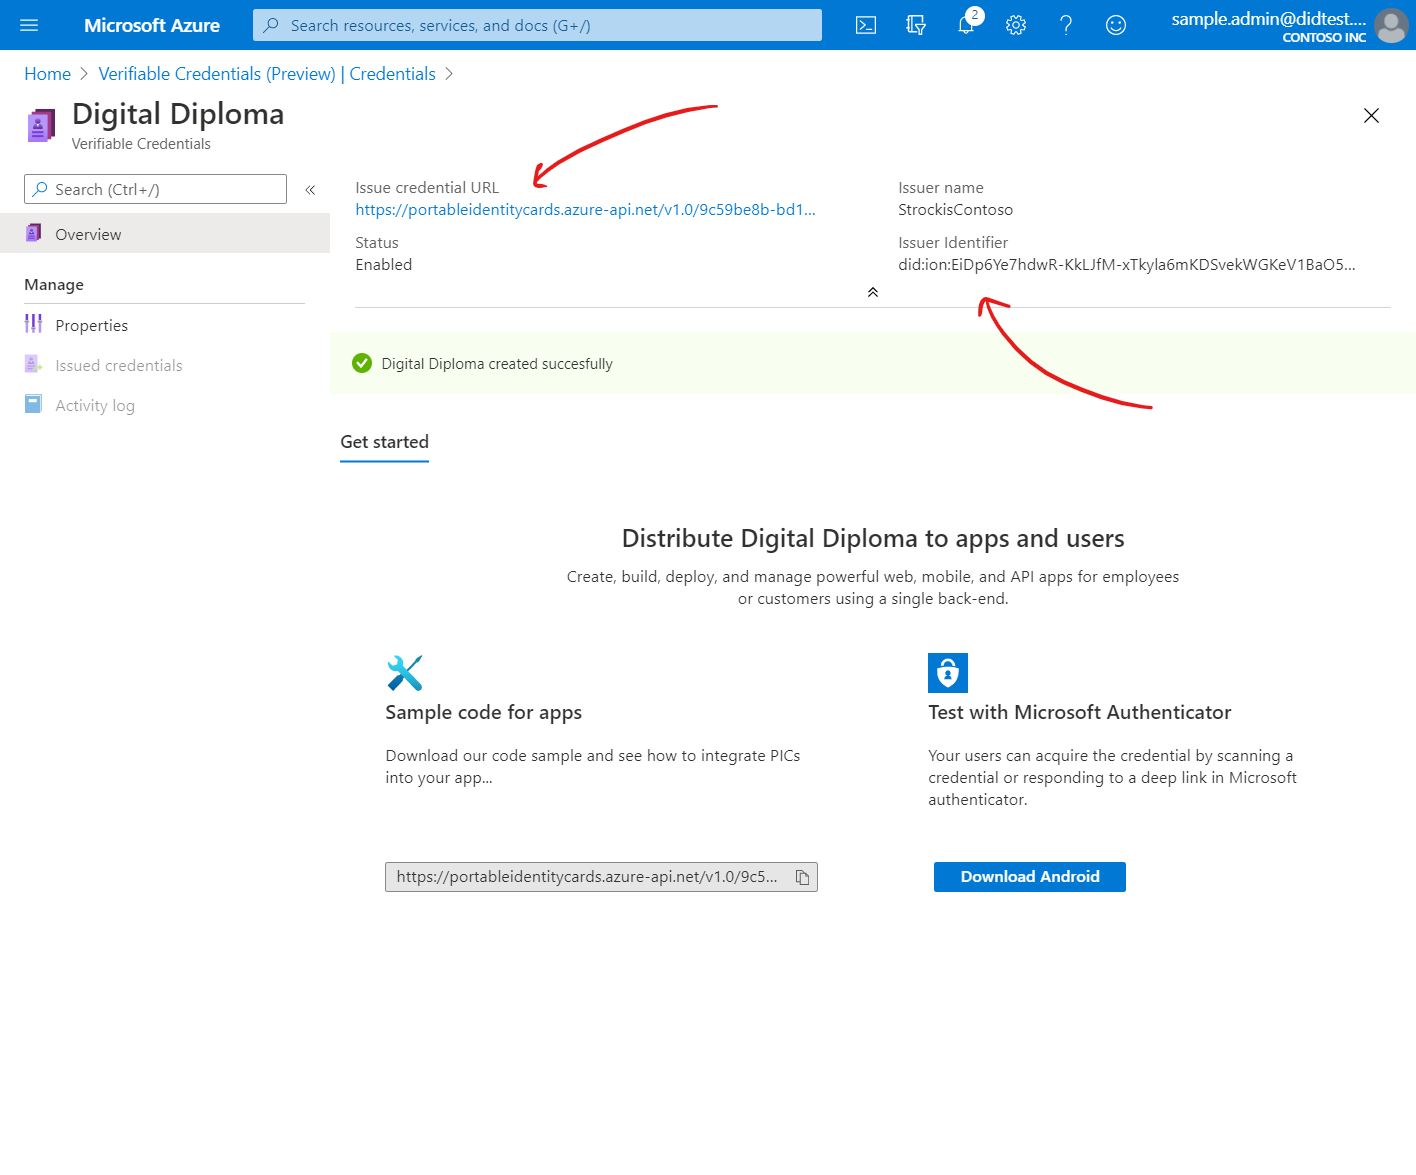
contract. After creating your credential in the Azure Portal, you will need to replace this value with the Issue Credential URL generated by the Azure Portal.
Upload the display file
Once you've constructed your display file, you must upload the file to your Azure Blob Storage account to be used by the issuer service when issuing Verifiable Credentials.
.json extension to the same Azure Storage container where you uploaded your rules file. Once uploaded, copy the URL to your display file blob from the Azure Portal. The URL should be similar to https://mystorage.blob.core.windows.net/mycontainer/MyCredentialDisplayFile.json, without any spaces or special characters.


You've now successfully defined the properties and contents of your Verifiable Credential. If you'd like to reference a working example of a display file, please see our code sample on GitHub.
To check if your rules and display file have been uploaded correctly, you can click on the Issuer credential URL link which will open a JSON file in a new tab if successful. If the issuer service cannot access your files, you should receive an error message.
When your credential has been created and you've copied the necessary values, continue onto the next article to build a website that issues credentials.
See something missing? We'd love your feedback and input on the Verifiable Credentials preview. Please contact us. When you use Microsoft DID Services, you agree to the DID Preview Agreement and the Microsoft Privacy Statement.